I have started rebuilding the Nearscapes™ Gallery:
 Nearscapes is a term I coined to represent closer views of the world (a contraction of Nearby Landscapes). I originally intended this to be all close-up views, but I am now starting to rebuild this gallery with wider than normal views including panoramic ones but all taken closer in than usual with normal panoramic views.
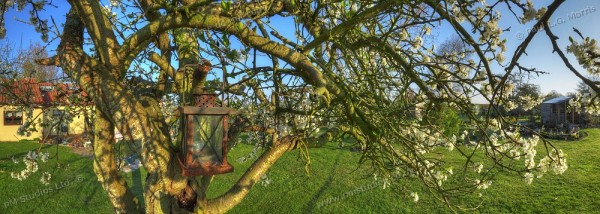
The first few images I have placed in the gallery are of the blossom of a Victoria plum tree. The one I show above is within the canopy of the tree showing an old rusting lantern hanging on the tree but widening the view to show the blossom and the scene beyond.
This first set of images were taken using a compact camera, mounted on its side on a home-made panoramic head. This allowed me to get in close within a confined space. Up this close the slightest of breezes, hardly noticeable, would move the blossom, leaves and branches. The only time it was still enough was first thing in the morning. Yet, too early and the sun was too low down. While the tree was in flower, there were only a few mornings, for less than an hour, where conditions were good enough. Even so, I had many rejections.
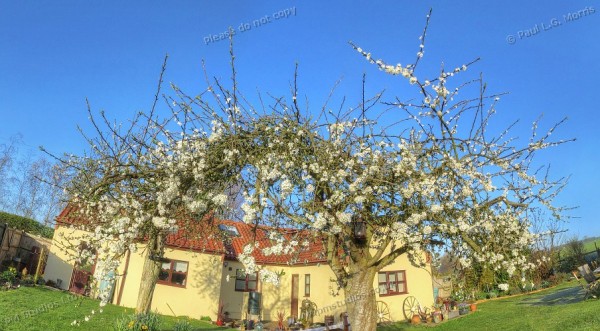
With this view I have deliberately pointed the camera up:
 This was to show the full sweep of the blossom on the plum tree. In doing so, this has distorted the view of the house – a hazard with panoramic views. You can see there is plenty of blossom, I just hope we get plenty of plums as last year this tree did not produce many. One of life’s great pleasures is to a eat a Victoria plum fresh from the tree on a warm summer’s day…
This final view is close in to the blossom from the outside of the tree:
 For this view, the camera is about 6 -8 inches from the blossom near the centre. In the original, you can see an amazing amount of detail in the flowers.
You can view larger versions in the Nearscapes gallery – more images will be added as I take and prepare them.
